These gluten free dairy free fudge brownies are delicious and have a richer chocolate flavor. They're perfect for dessert or as an indulgent treat!
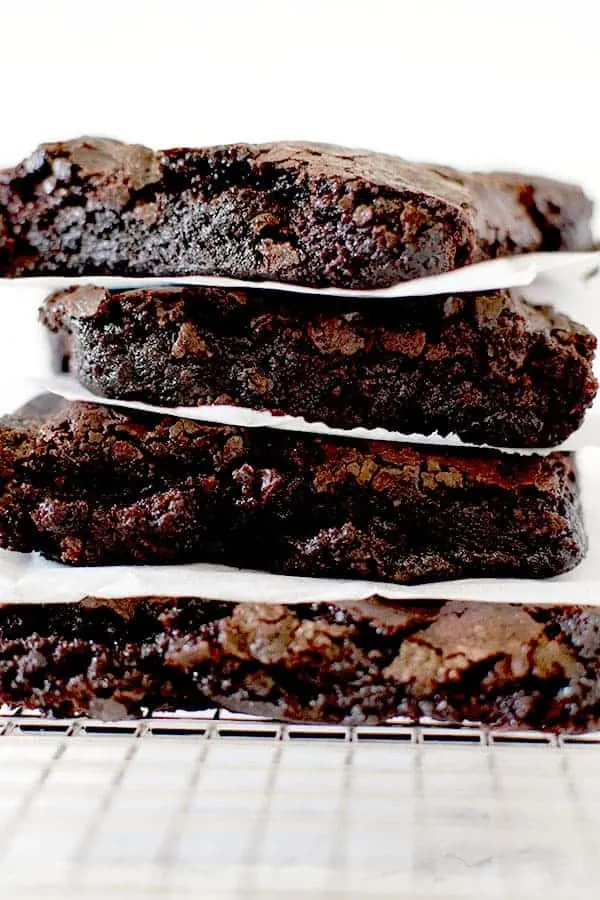
These gluten free dairy free brownies are based off of my oh so yummy dairy free fudge brownie recipe.
HISTORY OF BROWNIES
Brownies were created by the pastry chef of the Palmer House Hotel in 1893.
Bertha Palmer, a prominent Chicago socialite and philanthropist whose husband owned the hotel, asked a pastry chef for a cake-like confection, that was smaller than a piece of cake, which would be easy to transport and could be included in boxed lunches.
Palmer was head of the Board of Lady Managers for the 1893 World’s Fair and the dessert was to be given at the Women’s Pavilion.
The result was the Palmer House Brownie, made of chocolate with walnuts and an apricot glaze, which The Palmer House Hotel still serves as a dessert to this day.
By 1907, the brownie were a popular dessert appearing in American cookbooks all over the country.
DRY VS LIQUID MEASURING CUP
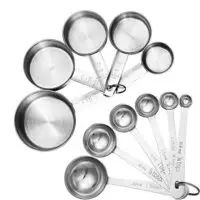
Dry measuring cups are a set of cups that often come with measuring spoons. Each cup is a different measurement just like each spoon is a different measurement.
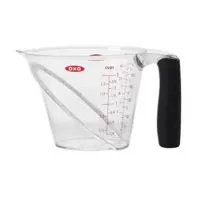
Liquid measuring cups, on the other hand, are cups that have measuring lines on the side to mark the measurements.
The problem with using liquid measuring cups to measure dry ingredients (like flour and cocoa) is that they are powders. So, as you shake the cup to level them off, the powders settle and you end up with more than you need.
I tested this with a friend who didn't believe me and we ended up with a number of tablespoons more than the recipe called for.
WHY sift Powdery Ingredients
There are a number of benefits to sifting powdery ingredients like flour and cocoa.
First of all, flour is often sifted before use to aerate it and remove any lumps. This helps in achieving a lighter texture in baked goods.
Secondly, if you measure flour that's just been sifted, you can get a more accurate measurement than from flour that's been packed tightly in a bag.
In addition, sifting dry ingredients together, such as flour, cocoa, and baking powder, helps make sure they're evenly dispersed.
BAKING WITH OIL
Baking with oil produces a moister and tenderer texture compared to that of baked goods made with butter.
Cakes, cupcakes, muffins, and quick breads also tend to bake up taller with a better crumb and stay moist and tender much longer than recipes made with butter.
Also, since oil weighs less than butter, baked goods made with oil have a lighter texture than those made with butter.
In addition, butter is usually only 80% fat, whereas oil is 100% fat. As a result, the water that's present in butter strengthens the gluten in the flour, making it more dense and less tender than baked goods made with oil.
Oil is often used in recipes where a lighter and airier texture is desired or in recipes that call for both oil and butter, in order to have the benefits of oil while keeping the butter flavor.
Which Type Of Oil to Use
I use neutral oils like canola oil, safflower oil, and vegetable oil. You can also use stronger oils like olive oil and coconut oil, but they may change the taste somewhat.
Is it better to use canola oil or olive oil?
Canola oil is relatively cheap and, due to its lack of flavor and high smoke point, is very versatile.
Olive oil, on the other hand, is healthier. Also, its stronger flavor makes it preferable in recipes such as focaccia, which require its distinct taste.
Baking with Oil Conversion Chart
If you want to convert your butter recipes to oil recipes, take a look at my baking with oil - butter to oil conversion chart.
How to store Oil
Store oils in a cool, dark place to prevent them from becoming rancid.
If refrigerated, some oils, like olive oil, may solidify, but will return to a liquid state at room temperature.
Coconut oil begins to solidify in temperatures under 76ºF or 25ºC.
Cocoa
Cocoa adds a rich chocolate flavor and a nice brown color to recipes. It also helps balance sweetness in recipes, adds moisture to baked goods, and can be used to decorate food.
It's used to make recipes like brownies, chocolate cake, chocolate sauce, chocolate cookies, chocolate muffins, and chocolate cupcakes. Cocoa can also be found in surprising places like cinnamon babka (just for the purpose of coloring) and savory dishes, such as chili and mole sauces.
The color can vary depending on the type of cocoa used. Natural cocoa powder tends to create a lighter color, while Dutch-processed cocoa results in a darker one.
Cocoa also adds moisture to recipes, giving baked goods a softer and tenderer texture.
Also, when combined with baking soda, cocoa's acidity activates the leavening agent, contributing to the rise and lightness of baked goods.
Furthermore, cocoa is often used for decorative purposes. It is dusted on top of cakes, used as a coating for truffles, sprinkled over whipped cream, and to create a dusted effect for plated desserts.
WHICH TYPE OF COCOA TO USE
When a recipe calls for cocoa, always use unsweetened cocoa powder, unless specified otherwise.
This allows you to have better control of the sweetness of what you’re making.
There are three basic forms of unsweetened cocoa powder: natural cocoa powder, dutch-processed cocoa power, and raw cocoa powder.
NATURAL COCOA POWDER
Natural cocoa powder comes from cocoa beans that are fermented, roasted, processed at a higher heat, and milled into a powder.
It’s bitter with a very strong and concentrated chocolate flavor.
This cocoa powder is acidic and is often used in recipes calling for baking soda because the two react with each other to allow your baked good to rise.
This is most commonly used, and should be used, in recipes that simply say "cocoa powder."
DUTCH-PROCESSED COCOA POWDER
Dutch-processed cocoa powder starts with cocoa beans that have been washed in potassium carbonate, which neutralizes their acidity.
Since Dutch-processed cocoa powder is neutral, it does not react with baking soda.
When baking, Dutch-processed cocoa is often paired with baking powder.
Dutch-processed cocoa powder can also be used in place of natural cocoa powder in recipes that don’t require leavening.
These include sauces, hot cocoa, frostings, ice cream, pudding, etc.
If you only have Dutch-processed cocoa powder on hand, you can substitute it for neutral cocoa powder.
Just make sure to add ⅛ teaspoon of cream of tartar, white vinegar, or lemon juice for every 3 tablespoons of cocoa powder called for in the recipe.
RAW CACAO POWDER
Raw cacao powder is different from natural and Dutch-processed unsweetened cocoa powder.
It's pure powder from the cacao bean and isn't nearly as processed as either natural or Dutch-processed.
Cocoa is processed at high heat, which destroys much of the nutritional benefits of the cacao seed.
Also, cocoa powder is often alkalized during processing to reduce acidity. The result is a product that’s less bitter and more soluble when added to liquids.
Cacao powder, on the other hand, is made of fermented - not roasted - seeds that are processed at low temperatures and then milled into a powder, ensuring that its nutritional benefits and its bitter flavor are preserved.
You can use raw cacao powder in recipes that don’t specify Dutch-processed cocoa powder, however it is best not to try to.
Compared to cocoa powder, cacao powder has a stronger flavor, it is not as absorbent as cocoa powder, and it is more acidic, so it will react differently with baking soda.
Sweetened Cocoa
Sweetened cocoa contains sugar and is suitable as a hot chocolate mix, but not suitable for recipes.
What's the difference between cocoa powder and cacao powder?
Cocoa powder is made by roasting cacao beans and processing them at high heat.
Cacao powder is made by cold-pressing unroasted cacao beans. It's often considered more "raw" and retains more nutrients.
Both can be used interchangeably in recipes.
Can I use Dutch-processed cocoa instead of natural cocoa?
Yes, but it can affect the acidity and leavening in the recipe. Adjustments may be needed for baking powder or baking soda.
To do this, simply add ⅛ teaspoon of cream of tartar, white vinegar, or lemon juice for every 3 tablespoons of cocoa powder called for in the recipe.
Can I use sweetened cocoa mix instead of unsweetened cocoa in baking?
No, because sweetened cocoa mix contains sugar. The added sugar can alter the sweetness and moisture of the recipe.
How to substitute chocolate with cocoa powder in recipes
How you substitute chocolate with cocoa powder depends on the type of chocolate that is called for. Mix the ingredients together in a bowl first before adding them to the rest of the recipe.
Cocoa substitute for sweet baking chocolate
To replace 4 ounces of sweet baking chocolate, use ¼ cup unsweetened cocoa powder plus ⅓ cup sugar and 3 tablespoons oil or shortening.
Cocoa substitute for semisweet and bittersweet baking chocolate
To replace 4 ounces of semisweet and bittersweet chocolate, use ¼ cup unsweetened cocoa powder plus 2 ½ tablespoons sugar and 3 tablespoons oil or shortening.
Cocoa substitute for unsweetened baking chocolate
To replace 4 ounces of unsweetened chocolate, use ¼ cup unsweetened cocoa powder plus and 3 tablespoons oil or shortening.
How do I prevent lumps when using cocoa in recipes?
Sift the cocoa into the bowl to remove lumps.
How to Store Cocoa
Store cocoa in an airtight container and keep in a cool, dark place to prevent moisture absorption and maintain flavor.
Sugar
The primary role of sugar is to be a sweetener. However, sugar also contributes to the tenderness and moistness of the baked good by absorbing and retaining moisture and helps create the golden brown color when baking as it caramelizes.
Recipes with more sugar often result in softer, moister textures. However, I learned the hard way that too much sugar leads to a sticky mess.
When it's heated, sugar caramelizes, resulting in a rich, complex flavor and a brown color. This adds both flavor and color to baked goods and is also the process in which caramel sauce, dulce de leche, caramel candies, and regular candies are made.
When used in recipes containing yeast, the sugar is eaten by the yeast, producing carbon dioxide and causing the dough to rise.
Sugar also acts as a preservative in jams, jellies, and fruit preserves by reducing water activity and preventing microbial growth.
There are many different types of sugar, including white sugar, brown sugar, vanilla sugar, powdered sugar, turbinado sugar, and demerara sugar.
When a recipe calls for “sugar” without specifying anything else, it's referring to regular white sugar.
White Sugar
White sugar (sometimes called granulated sugar, table sugar, or white granulated sugar) is made of either beet sugar or cane sugar, which has undergone a refining process.
It is the easiest to find and most commonly used.
Brown Sugar
Brown sugar is white sugar with molasses added to it.
It is commonly used in chocolate chip cookie recipes, and it’s rare for a recipe that calls for brown sugar not to also call for white sugar as well.
When a recipe calls for “brown sugar” but doesn’t specify what type (light or dark), it is referring to light brown sugar.
In my recipes, you can use whatever type of brown sugar you have on hand, whether it is dark brown sugar, light brown sugar, or demerara sugar - which is very common in Israel.
Just keep in mind that the flavor and color will be slightly different, depending on what you choose to use.
Turbinado Sugar
Turbinado sugar is better known as "raw sugar." But, despite this name, the sugar is not really “raw.”
Instead, it's partially refined sugar that retains some of the original molasses.
The term "raw sugar" may also give off the impression that it is somehow healthier.
In reality, turbinado sugar is nutritionally similar to white sugar.
Demerara Sugar
Demerara sugar is very popular in Israel and is especially delicious in tea, but is also used for baking.
Unlike white sugar, demerara sugar undergoes minimal processing and retains some vitamins and minerals.
However, it is still not much healthier than white sugar.
Vanilla Sugar
Vanilla sugar is not very common in the States. However, it is common in Israel and parts of Europe.
This is sugar that sat for an extended period of time with vanilla beans, giving it a vanilla flavor.
Caster Sugar
This type of sugar is common in the United Kingdom.
It has a grain finer than white (granulated) sugar and larger than powdered sugar.
Caster sugar is often called for in recipes for delicate baked goods like meringues, souffles, and sponge cakes.
You can use a 1:1 conversion rate between caster sugar and white (granulated) sugar.
Powdered sugar
Powdered sugar, sometimes known as confectioners’ sugar, is a sugar with a powdered texture.
This sugar is rarely used for baking. Instead, it is used for dusting desserts and making frosting, icing, and glazes.
In some countries, you can also find powdered vanilla sugar.
It is made the exact same way regular vanilla sugar is made. However, the sugar used is powdered instead of granulated.
Vanilla Extract vs Vanilla sugar
In my recipes, I don’t specify what kind of vanilla to use.
The reason for this is that in the States, vanilla extract is exclusively used.
Meanwhile in Israel, along with many European countries, vanilla sugar is common.
In most, if not all recipes, both vanilla extract and vanilla sugar can be used.
In recipes where vanilla sugar can be used instead of extract, you can replace them 1:1.
Replacing Sugar with Honey
If you’d prefer to use honey instead of sugar, you can do so with pretty good results.
Honey can be two or even three times as sweet depending on the honey, so for every 1 cup of sugar, you can use ½ to ⅔ cup honey.
Since honey adds liquid, you need to remove some to balance it out. For every cup of honey, remove a ¼ cup of liquid.
Also, it burns faster than granulated sugar, so you want to lower the baking temperature by 25 F. In addition, check it early and often to avoid burning or overbaking.
How to Store Sugar
Sugar should be stored in an airtight container to prevent clumping and moisture absorption, and kept in a cool, dry place.
Types of Vanilla
Vanilla comes from a pod commonly known as a “vanilla bean”, which comes from the vanilla orchids.
Vanilla pods have been used for flavoring since the Aztecs and was introduced to Europe by a Spanish conquistador, along with cocoa.
Vanilla Extract
Vanilla extract is created by soaking vanilla beans in alcohol for some time. This is the most commonly used type of vanilla.
Vanilla Sugar
Vanilla sugar is common in Europe and some parts of the Middle East, like Israel.
It is made from vanilla beans sitting in sugar, vanilla bean powder mixed with sugar, or sugar mixed with vanilla extract.
In some countries, like Italy, you can also find vanilla powdered sugar, which is used for confections.
Vanilla Paste
Vanilla paste is generally a specialty item. It is a thick paste that contains a blend of the scraped-out vanilla pod seeds and vanilla extract.
You can use it as you do vanilla extract and it will leave flakes of vanilla bean like you see in vanilla bean ice cream.
Imitation Vanilla
Imitation Vanilla, otherwise known as artificial vanilla or vanilla essence, is made from synthetic vanilla.
This is the compound that naturally occurs in vanilla beans and gives it its flavor.
Can I use imitation vanilla?
Many will tell you that you should use high quality vanilla, just like they say you should use the best cocoa.
However, most of us will probably not be willing to pay the hefty price that comes with exceptionally high-quality ingredients.
Overall, vanilla is very expensive, so the extract is as well.
So, if you’re not going to get regular quality vanilla extract, you might as well use imitation vanilla.
Can vanilla extract be used as a substitute for vanilla beans?
Yes, vanilla extract can be used as a substitute for vanilla beans. Use about 1 teaspoon of vanilla extract for each inch of vanilla bean.
How to Store Vanilla
Pure vanilla extract and other vanilla products should be kept away from heat and light, and should be stored in an airtight container in a cool, dark place.
DO EGGS NEED TO BE AT ROOM TEMPERATURE?
The short answer is "no." While a side-by-side comparison shows that baking with eggs at room temperature makes a better crumb, it’s not otherwise noticeable.
What are Eggs used for?
Eggs do three things in most recipes: they help bind the ingredients together, act as a mild leavening agent, and they add moisture.
ARE EGGS DAIRY?
No, eggs are not dairy. Dairy is milk and any food products made from milk, including cheese, cream, butter, and yogurt.
So, while eggs are an animal product, they are not dairy. In fact, eggs fall under the protein food group.
How to tell if your eggs are still good
Fill a glass with cool water and submerge the eggs.
If the eggs sink to the bottom and lay flat on their side, they're still fresh.
If they sink, but stand on one end at the bottom of the glass, the eggs are not as fresh but still good.
An egg that floats to the top is likely spoiled.
EGGLESS OPTION
Eggs can be substituted with ¼ cup of unsweetened apple sauce per egg. This means that for recipes calling for 2 eggs, you’d need ½ cup of unsweetened apple sauce.
The reason applesauce makes a good binder is that it's high in pectin. Pectin is a naturally occurring starch in fruits and berries that acts as a thickening agent and stabilizer in food.
This happens when combined with sugar and acid (if the fruit or berry isn't naturally acidic).
Just keep in mind that it may change the flavor slightly.
BAKING AT HIGH ALTITUDES
The higher the altitude, the lower the air pressure and the more difficult it is to bake recipes.
Increase by 15 to 25°F or 8 to 14°C. Since leavening and evaporation happen more quickly, the higher temperature helps set the structure of baked goods before they over-expand and dry out.
However, baking at higher temperatures means products are done sooner, so decrease by 5-8 minutes per 30 minutes of baking time.
Adjustment for 3000 feet
- Reduce baking powder: for each teaspoon, decrease ⅛ teaspoon.
- Reduce sugar: for each cup, decrease 0 to 1 tablespoon.
- Increase liquid: for each cup, add 1 to 2 tablespoons.
Adjustment for 5000 feet
- Reduce baking powder: for each teaspoon, decrease ⅛ to ¼ teaspoon.
- Reduce sugar: for each cup, decrease 0 to 2 tablespoons.
- Increase liquid: for each cup, add 2 to 4 tablespoons.
Adjustment for 7000+ feet
- Reduce baking powder: for each teaspoon, decrease ¼ teaspoon.
- Reduce sugar: for each cup, decrease 1 to 3 tablespoons.
- Increase liquid: for each cup, add 3 to 4 tablespoons.
Adjusting for a Convection Oven
Convection ovens blow the hot air around, producing around 25 to 30 percent more heat.
Since convection ovens produce more heat, you need either lowering the temperature or shortening the cooking time to compensate.
When recipes specify temperatures and cooking times, it’s for conventional ovens, unless specified otherwise.
A simple rule to follow is to lower the temperature by 25ºF or 14ºC when baking cookies and pies, and 50ºF or 28ºC when roasting meat and poultry. Some convection ovens offer separate settings for baking and for roasting.
You can also leave the temperature the same and instead, shorten the cooking time by 25 percent. For example, if your recipe calls for 60 minutes in the oven, check the food after 45 minutes instead.
However, keep in mind, some convection ovens actually make a heat adjustment for you. That is, if you set a convection oven for 350ºF, it might actually set itself to 325ºF to compensate. So, check your manual before making adjustments.
HOW TO DOUBLE THE RECIPE
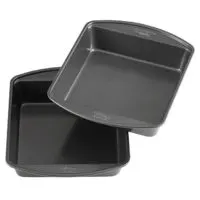
If you double the recipe you will need a 9 x 13-inch pan.
The area of a square or rectangular pan is calculated by multiplying one side times the other side.
This recipe calls for an 8-inch square pan so an 8 x 8 = 64 square inches where a 9 x 13 = 117 square inches. If you double the 8 x 8-inch pan it would come out to 128 square inches which is close enough to 117 square inches.
TROUBLESHOOTING
WHY IS IT TAKING LONGER THAN DESCRIBED TO BAKE?
Overtime, the thermostat on ovens gets a little off, causing some ovens to run hot and others to run cool. This is why recipes tend to say things like “10 to 15 minutes or until golden brown.”
So, if it takes you longer than expected, that’s fine. Just keep baking until ready.
WHY DID MY RECIPE COME OUT TOO DRY?
Just like some ovens run cool, others run hot. If your oven runs hot, bake these at a lower temperature. Ideally, you should get an oven thermometer to know what temperature you’re really baking at.
HOW TO STORE
For a pan of brownies, wrap well in plastic wrap or in an airtight plastic storage bag. Keep at room temperature for up to four days.
For cut brownies, wrap individually with plastic wrap. Store in an air tight container or an airtight plastic bag. Keep at room temperature for one to two days.
HOW TO FREEZE
Wrap cooled uncut brownies tightly in a plastic wrap. Wrap again in aluminum foil. Freeze for up to 3 months. After 3 months the brownies are still safe to eat but the quality begins to degrade.
SNAFU:
The first time I made these brownies I didn’t line the bottom of the pan with baking paper. I didn’t even grease and flour it. Nope, I just gave it a light coat of oil.
Big mistake. These brownies really stick to the bottom and it took tons of effort to cut them and get them out without ruining their shape.
Gluten Free Dairy Free Brownies
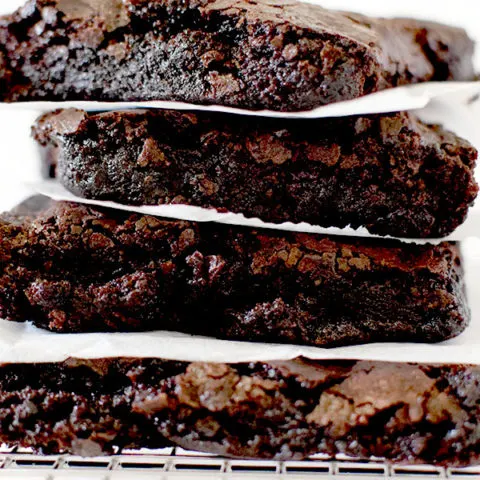
These gluten free dairy free fudge brownies have a richer chocolate flavor. Make sure to use a gluten free all-purpose flour that says can replace regular all-purpose flour 1:1.
Ingredients
- ½ cup gluten free all-purpose flour with xanthan gum (65 grams)
- ½ cup unsweetened cocoa powder (65 grams)
- 1 cup white sugar (200 grams)
- ¼ teaspoon salt
- 6 tablespoons oil
- 2 eggs
- 2 teaspoons vanilla
Instructions
- Preheat oven to 350°F or 175°C.
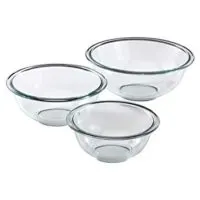
- Whisk together flour, cocoa, sugar, and salt in a mixing bowl.
- Add oil, eggs, and vanilla. Mix until smooth.
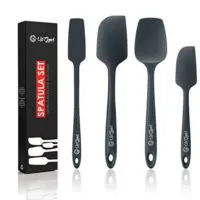
- Using a baking spatula, pour batter into a 8×8 baking pan lined with parchment paper.
- Bake for 20-25 minutes, or until the center of the brownies is firm to the touch.
- Remove and let cool to room temperature. Chill before cutting for greater ease.
Recommended Products
Some of the links below are affiliate links, which means that if you choose to make a purchase, I will earn a small commission. This commission comes at no additional cost to you.
Nutrition Information:
Yield:
9Serving Size:
1Amount Per Serving: Calories: 231Total Fat: 11gSaturated Fat: 1gTrans Fat: 0gUnsaturated Fat: 9gCholesterol: 41mgSodium: 75mgCarbohydrates: 30gFiber: 1gSugar: 22gProtein: 3g
