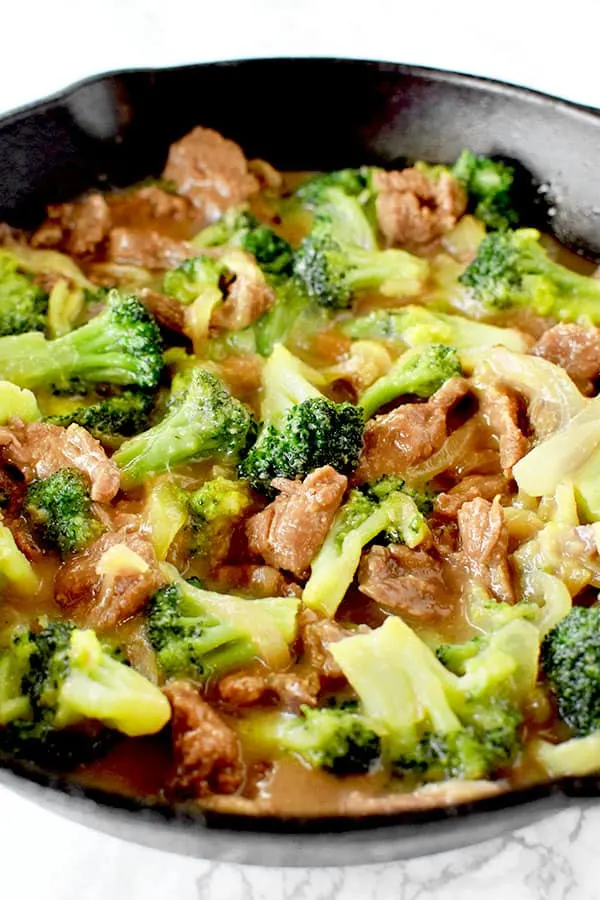
Beef and broccoli is one of the most popular Chinese takeouts and is really easy to make at home. Serve it with rice.

Broccoli Beef originates from a Chinese dish called Beef fried with Broccoli.
However, Chinese broccoli is very different than American broccoli, so the dish had to be adapted.
Also, the sauce is much thinner than what you'd expect from American-Chinese Beef and Broccoli.
Chinese immigrants brought their native dish with them and then adapted it to use local ingredients and to suit the American pallet.
Why Steam the Broccoli
Many recipes before Beef and Broccoli call for blanching the broccoli.
However, this can cause the broccoli to hold too much water and then water down the sauce.
I think that steaming the broccoli does pretty much the same thing blanching does without getting it too wet and leaves the sauce thick.
Can I Use Frozen Broccoli?
Yes. Frozen broccoli is fine to use.
Just make sure it's not too wet from defrosting when you use it. Otherwise, you will have similar problems to blanching.
What is a Slurry?
A slurry is defined as "a semiliquid mixture, typically of fine particles of manure, cement, or coal suspended in water."
A cornstarch slurry is a mixture of a cold liquid with cornstarch.
If you use hot liquid, the cornstarch will gelatinize with the liquid - ruining it.
Cornstarch is used as a thickening agent, and particularly common in Asian sauces.
However, if you put it in as a powder, it will clump up. So, it must be turned into a slurry first.
Why use it with the meat?
This technique is known as "velveting".
The name comes from the fact that meats marinated with cornstarch have a velvety smooth texture on the outside.
The velveting also helps the meat retain moisture.
IS KOSHER Meat BETTER?
Kosher animals are kept in better conditions than non-kosher animals due to strict kosher health requirements of the animals.
Also, the salting process used as part of the process of making meat kosher is similar to dry brining, and therefore produces a better quality meat.
While I’ve only eaten kosher meat and so I cannot compare, I’ve been told by non-Jews who do not keep kosher that they’ve noticed that kosher meat is of superior quality to cook with.
SHOULD YOU WASH Meat?
According to the USDA, you should not wash meat or poultry because water can splash bacteria up to 3 feet surrounding your sink.
A study done by Drexel University shows that it is best to move meat and poultry directly from package to pan. The heat from cooking will get rid any bacteria that may be present.
HOW CAN I CLEAN MY meat WITHOUT WASHING IT?
If you want to clean your meat without washing it, wipe it down with a wet paper towel.
Just make sure the paper towel doesn't touch anything else and to toss the paper towel right away.
HOW TO DEFROST Meat
IN THE FRIDGE
Defrosting meat in the fridge is the most highly recommended.
To do this, place the frozen meat in a pan and let it thaw. Oftentimes when meat thaws, it releases liquids that can leak onto your fridge, so the pan is really helpful.
Meat typically takes a full day to thaw. Once thawed, it can remain in the refrigerator for a day or two before cooking.
IN COLD WATER
Defrosting meat in water should take two to three hours.
Submerge your sealed meat in a pot or bowl full of cold water. Change out the water every 30 minutes or so.
Do not use hot water because it can start cooking your meat.
Can you cook FROZEN meat?
According to the USDA, you can cook frozen meat. It will take 50% longer to cook, but it’s an option.
You should also cook it on a roasting rack or over vegetables so that the heat can circulate around the meat.
IS IT SAFE TO REFREEZE RAW meat?
According to the USDA, “food thawed in the refrigerator is safe to refreeze without cooking.” However, you do lose quality when refreezing previously defrosted meat.
Every time you defrost meat, it loses moisture as it thaws, which also leads to a loss in flavor. To compensate for this, marinate the meat to add more flavor and juice.
The USDA also says not to “refreeze any foods left outside the refrigerator longer than 2 hours; 1 hour in temperatures above 90°F.”
SHOULD YOU BRINE meat?
Brining actually doesn’t do anything to help meat. In fact, it makes it soggy rather than juicy, with watered-down flavor.
Aromatic brines and stock don’t help with flavor either. This is because the salt pulls water molecules in, leaving most of the flavor behind.
DRY BRINING
A dry brine, on the other hand, loosens up muscle fibers, allowing them to retain more moisture without adding any excess liquid.
Initially, the salt draws moisture out, then it dissolves in this liquid, creating a concentrated brine, which eventually gets reabsorbed. This leads to more intensely flavored results.
An added benefit is that it also requires less space and mess than a water brine. Not to mention the fact that it allows for crispier skin.
CAN YOU DRY BRINE KOSHER MEAT?
Food experts are often under the impression that kosher meat and poultry cannot be brined or dry brined.
This is because of the koshering process, which involves salting the meat. However, the process is not nearly as long as the dry brining process, and unlike a dry brine, the meat is soaked to remove the salt.
So, since the process is different than a dry brine, it is fine and even recommended to dry brine kosher poultry and meat.
How do you dry brine meat?
Begin by patting the meat with paper towels. This will help the salt adhere to the meat.
Grab pinches of kosher salt and sprinkle it over the meat until the meat is generously salted and evenly coated.
Place the dry-brined meat on a rack or a plate and refrigerate it. Refrigerate meat for 45 minutes to 48 hours.
Once the waiting period is up, there is no need to rinse off the meat. Just cook it as usual.
HOW TO STORE MEAT
Once cooled, place in an airtight container and refrigerate. Store for 3 to 4 days.
HOW TO FREEZE MEAT
Freeze leftovers within 3-4 days. Place in an airtight container or resealable freezer bag.
Freeze for up to 6 months. After that, it is still safe to eat but the quality begins to degrade.
Kosher Beef and Broccoli

Beef and broccoli is a popular American-Chinese takeout dish. This recipe is easy to make at home.
Ingredients
- 1 pound flank steak (450 grams), sliced into thin 1-inch pieces (2.5 centimeters)
- 4 cups broccoli florets, steamed (700 grams)
- 3 tablespoons cornstarch
- 3 tablespoons water
- 1 medium onion, sliced
sauce
- ½ cup soy sauce (120 milliliters)
- ⅓ cup brown sugar (60 grams)
- 2 teaspoons ginger powder
- 4 teaspoon garlic powder
Instructions
- In a large bowl, add 2 tablespoons cornstarch. Slowly add and whisk in the water to create a slurry.
- Add the beef to the bowl and toss to combine.
- In a separate small bowl, add the remaining cornstarch. Slowly add the soy sauce and whisk to combine and make a slurry. Then, add brown sugar, garlic, and ginger. Set aside.
- Heat a little oil in a large nonstick sauté pan over medium heat. Add the beef and saute, stirring continually until the beef is almost cooked through. Transfer the beef to a plate and set it aside.
- Heat a little more oil in the pan. Add the onions and stir occasionally until soft.
- Add the sauce mixture. Bring the sauce to a simmer. Stir until it thickens.
- Add the beef and broccoli to the pan. Mix everything together over medium heat until the sauce coats the beef and broccoli.
- If the sauce is too thick, add a splash of chicken stock or water.
- Serve with rice.
Nutrition Information:
Yield:
6Serving Size:
1Amount Per Serving: Calories: 261Total Fat: 7gSaturated Fat: 3gTrans Fat: 0gUnsaturated Fat: 3gCholesterol: 60mgSodium: 1262mgCarbohydrates: 25gFiber: 4gSugar: 12gProtein: 26g